
A Step-by-Step Guide to Calibrating Multimeters: Best Practices for Accurate Electrical Measurements
Multimeters are essential tools for electrical engineers, technicians, and electricians. They provide valuable measurements for various electrical parameters such as voltage, current, and resistance. However, to ensure accurate and reliable results, it is crucial that multimeters are properly calibrated. Over time, even the best-quality multimeters can drift from their original settings due to factors like age, wear, or environmental conditions. Calibration helps restore the multimeter to its original performance, ensuring that the readings are accurate.
In this article, we’ll provide a step-by-step guide to calibrating a multimeter, along with best practices for maintaining its accuracy and reliability.
Why Calibrate a Multimeter?
Calibration is the process of adjusting the multimeter’s internal circuitry to match known reference standards. Without calibration, the multimeter may produce inaccurate readings, leading to faulty measurements, which can result in serious electrical issues. Regular calibration ensures:
Accuracy: Ensures that the multimeter provides true, reliable readings.
Compliance: Meets industry standards and regulatory requirements.
Safety: Prevents misreading of electrical parameters, which could lead to safety hazards.
Longevity: Increases the life span of the multimeter by maintaining its internal systems.
Tools Required for Calibration
Before you begin the calibration process, gather the necessary tools:
Precision Voltage Source: A highly accurate voltage source or a voltage calibrator is required to check the multimeter’s voltage readings.
Precision Current Source: A current source that can output a known, precise current for calibration.
Precision Resistor: Used to calibrate resistance measurements.
Test Leads: High-quality test leads to connect the multimeter to the calibration instruments.
Reference Multimeter: A multimeter with known accuracy, used to verify the readings of the device under calibration.
Step-by-Step Calibration Process
Step 1: Warm Up the Multimeter
Before starting the calibration process, allow the multimeter to warm up for at least 15-20 minutes. This is especially important for digital multimeters (DMMs) with auto-ranging functions, as components inside the multimeter may shift slightly in performance after being powered on. This warm-up period ensures that the instrument stabilizes and gives more accurate readings.
Step 2: Set the Multimeter to the Correct Measurement Mode
Multimeters can measure a variety of electrical parameters, including voltage (AC and DC), current (AC and DC), and resistance. Depending on the type of calibration you need to perform, set the multimeter to the appropriate mode. For example, if you’re calibrating the voltage measurement function, set the multimeter to measure DC or AC voltage accordingly.
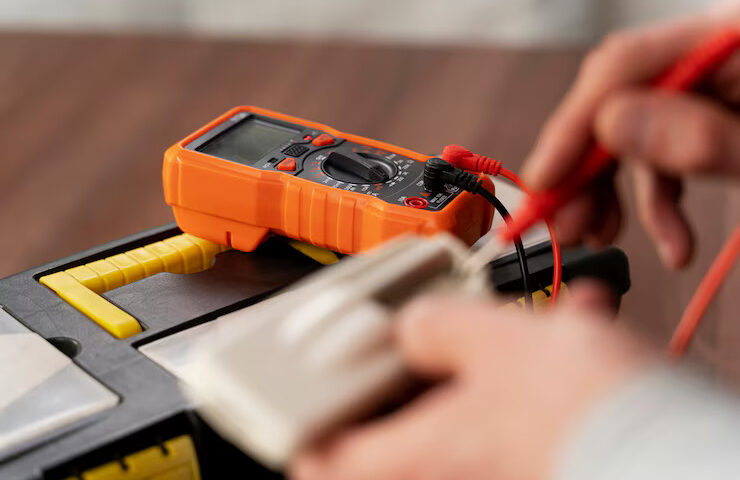
Step 3: Calibrate the Voltage Measurement
Connect the Multimeter to the Voltage Source: Use the test leads to connect the multimeter’s voltage input terminals to the precision voltage source.
Apply a Known Voltage: Set the voltage source to a known value (e.g., 1V, 10V, or 100V). Choose a voltage that spans the multimeter’s measurement range.
Compare Readings: Check the voltage reading on the multimeter and compare it with the known voltage applied by the source.
Adjust the Multimeter (if needed): If the multimeter reading deviates from the known voltage, use the internal calibration adjustment (often accessible via a small screw or button inside the multimeter) to adjust the reading. Some models may require software calibration, while others allow for manual adjustments via screws or potentiometers inside the multimeter.
Repeat for Different Voltages: Repeat this process for multiple voltages across the multimeter’s range to ensure accuracy at all points.
Step 4: Calibrate the Current Measurement
Connect the Multimeter to the Current Source: Set the multimeter to the appropriate current range and connect it to the precision current source.
Apply a Known Current: Set the current source to a known, precise current value, and then measure it with the multimeter.
Compare Readings: Ensure that the current reading on the multimeter matches the current value applied by the source.
Adjust the Multimeter: If necessary, adjust the multimeter to match the known current. As with the voltage measurement, this may involve fine-tuning internal components or recalibrating via software.
Repeat for Different Currents: Perform this calibration at various current levels, especially if your multimeter is designed to measure a wide range of currents (e.g., from microamps to amps).
Step 5: Calibrate the Resistance Measurement
Connect the Multimeter to a Known Resistor: Set the multimeter to measure resistance, and connect it to a precision resistor with a known value (e.g., 100Ω, 1kΩ).
Check the Reading: The multimeter should display the exact value of the resistor. If there is a discrepancy, adjust the multimeter accordingly.
Repeat for Different Resistance Values: Use several resistors of varying values to test the multimeter’s accuracy across a range of resistances. Adjust as necessary.
Step 6: Verify the Calibration
Once all the measurements (voltage, current, resistance) have been calibrated, use a reference multimeter to verify the accuracy of your multimeter readings. The reference multimeter should be a known, high-precision instrument that is already calibrated. Compare the readings of both multimeters to confirm that they match.
Best Practices for Maintaining Multimeter Calibration
After completing the calibration process, it’s important to follow best practices to maintain the accuracy of your multimeter:
Store Properly: Keep the multimeter in a clean, dry environment, away from extreme temperatures and humidity. Proper storage helps maintain the integrity of its internal components.
Use High-Quality Test Leads: The test leads you use should be in good condition. Worn or damaged leads can lead to inaccurate measurements.
Regular Calibration: Depending on the frequency of use and the precision required, calibrate your multimeter regularly. For high-precision applications, calibrating every 6 months or annually is recommended.
Document Calibration Results: Keep a record of each calibration, including the date, measurements, and any adjustments made. This documentation is essential for maintaining compliance with industry standards and can be helpful during audits.
Perform Self-Checks: Between calibrations, periodically check the multimeter’s performance with known reference values (e.g., standard voltage or resistance sources). This can help you spot any drifting or discrepancies early.
Conclusion
Calibrating a multimeter is an essential part of maintaining its accuracy and ensuring reliable measurements. By following the step-by-step calibration process outlined above, you can ensure that your multimeter delivers precise readings for voltage, current, and resistance. Regular calibration not only helps maintain the accuracy of measurements but also ensures that your multimeter meets industry standards and compliance requirements. Taking care of your multimeter through proper calibration practices will prolong its lifespan and help avoid costly errors in electrical testing and troubleshooting.
Write a Comment